1. FAQ
What is transfer numbers?
Transfer numbers is a way to submit requests to transfer (port out) your existing phone number from your old carrier so you can continue using it with Phone.com service.
This video explains the process.
What do I need to transfer my phone number?
The process begins when the form is completed which includes steps from verifying that the number is portable, LoA (Letter of Authorization) specifying the old carrier, name, address and a good contact number. Before you transfer your number to Phone.com, please also check the following:
- Make sure your phone number is active.
If you call the number, does it ring? If your number isn’t active, the number transfer will be rejected. - Check your phone contract for obligations.
Do you have an outstanding balance? Are there any freezes or holds on your account? If so, have those released. We also suggest checking that your number can be transferred. If you got the number from your provider’s inventory, they may not let you port it away. - Name or address mismatch.
When Phone.com submits the transfer request to your current provider, they will match the contact information you’ve given us against their records. If the information doesn’t match, they may reject it. Your best bet is to reach out to your provider to verify the exact name and address they have on file for your phone number. - Check for pending orders.
With some providers, if we submit a transfer request for a phone number that has any kind of “pending order” on it, they may reject the transfer until that issue is resolved. A pending order could be something as simple as updating your mailing address, or something more complex like pending configuration changes to your service.
We do our best to help you resolve issues as we go along, but if you want to save time and effort, we suggest checking off these items before trying to transfer your number.
How can I keep track of my number transfer?
While the number is being ported you can track your transfer request status on Configure > Numbers > Transfer requests tab. You will also receive an email when the number transfer is complete.
Will I be able to use my number while it’s being transferred?
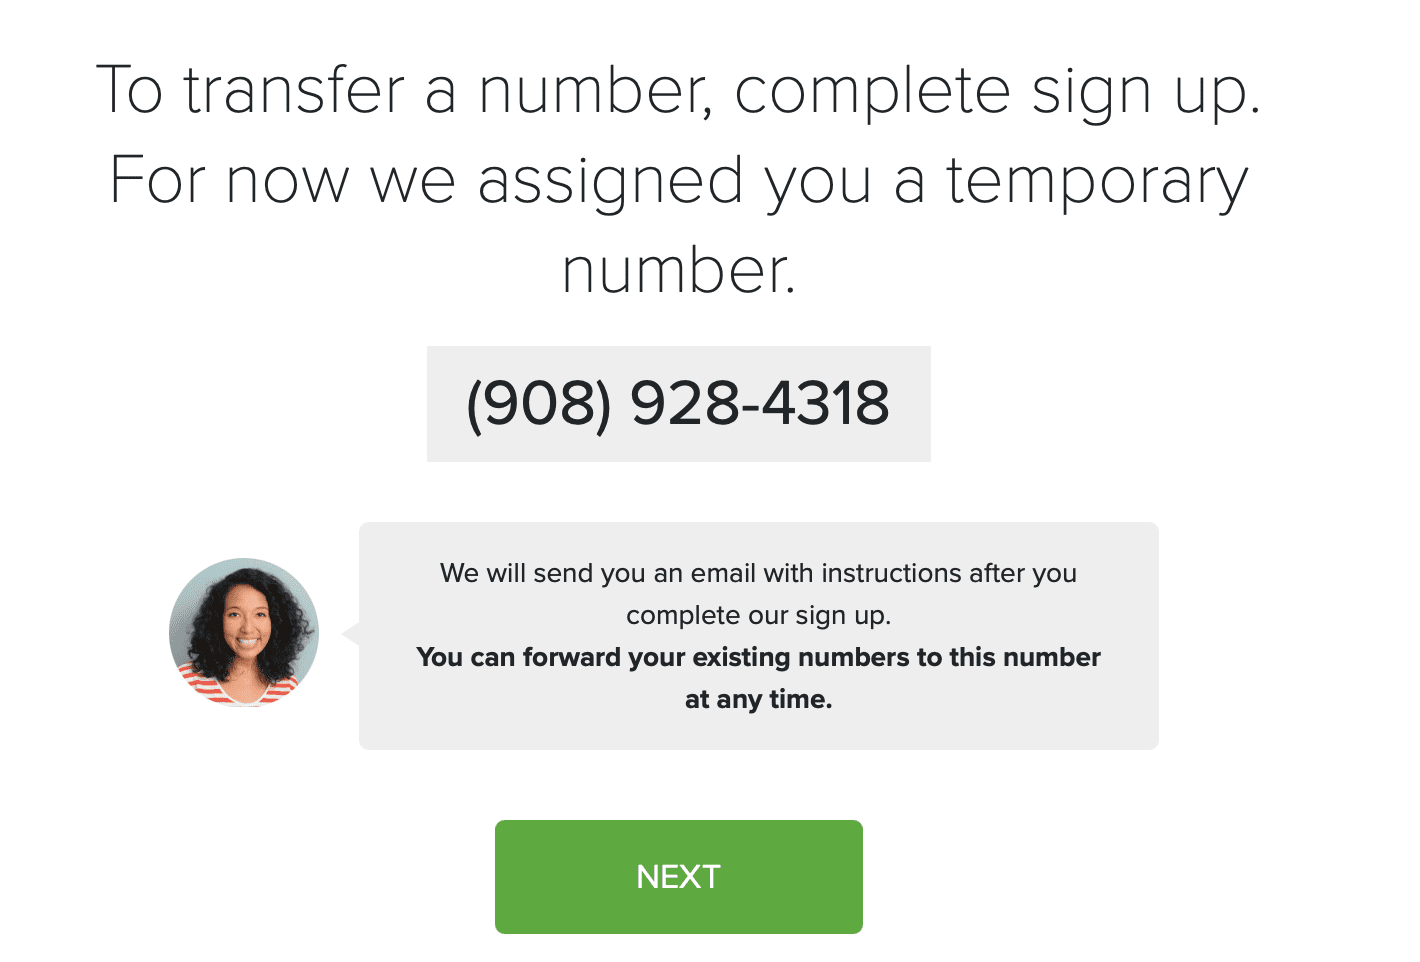
During the porting period we provide you with a temporary phone number that can be used in lieu of the actual number. This number will eventually clear out of the account as soon as the port out order is complete.
How long does it take to transfer my number?
Transferring a phone number can take anywhere between 7-10 business days, although in some cases the porting process can take up to 4 weeks.
Are there any costs associated with transferring my number?
The porting process is free of cost and simply requires your authorization.
How to configure my temporary number?
Temporary numbers are configured the same way other numbers are, to learn how visit the How to configure a phone number section.
What happens with my temporary number if my porting request is denied?
The temporary number remains on your account until you cancel the porting request.
What happens with my temporary number if my porting request is completed?
The temporary number will automatically drop from the account so you can begin using your permanent phone number.
How can I port out my number to another carrier?
Similar to porting in porting out must be initiated from the winning-carrier side. This means you must submit the request with the service provider you have chosen to get service from. If there are any requests not mentioned in the FAQ section above please contact our porting team by calling 800.998.7087 or emailing [email protected].
Can I save the draft in the transfer wizard and finish my submission later?
Currently, we are not supporting drafts. If you leave the wizard, you will lose all entered information and will need to start again.
2. Transfer number
For new customers who select “Transfer” during signup
- Go to our pricing page, select user plans and click Next button
- On the picking a number step select “Transfer” option and click Next button
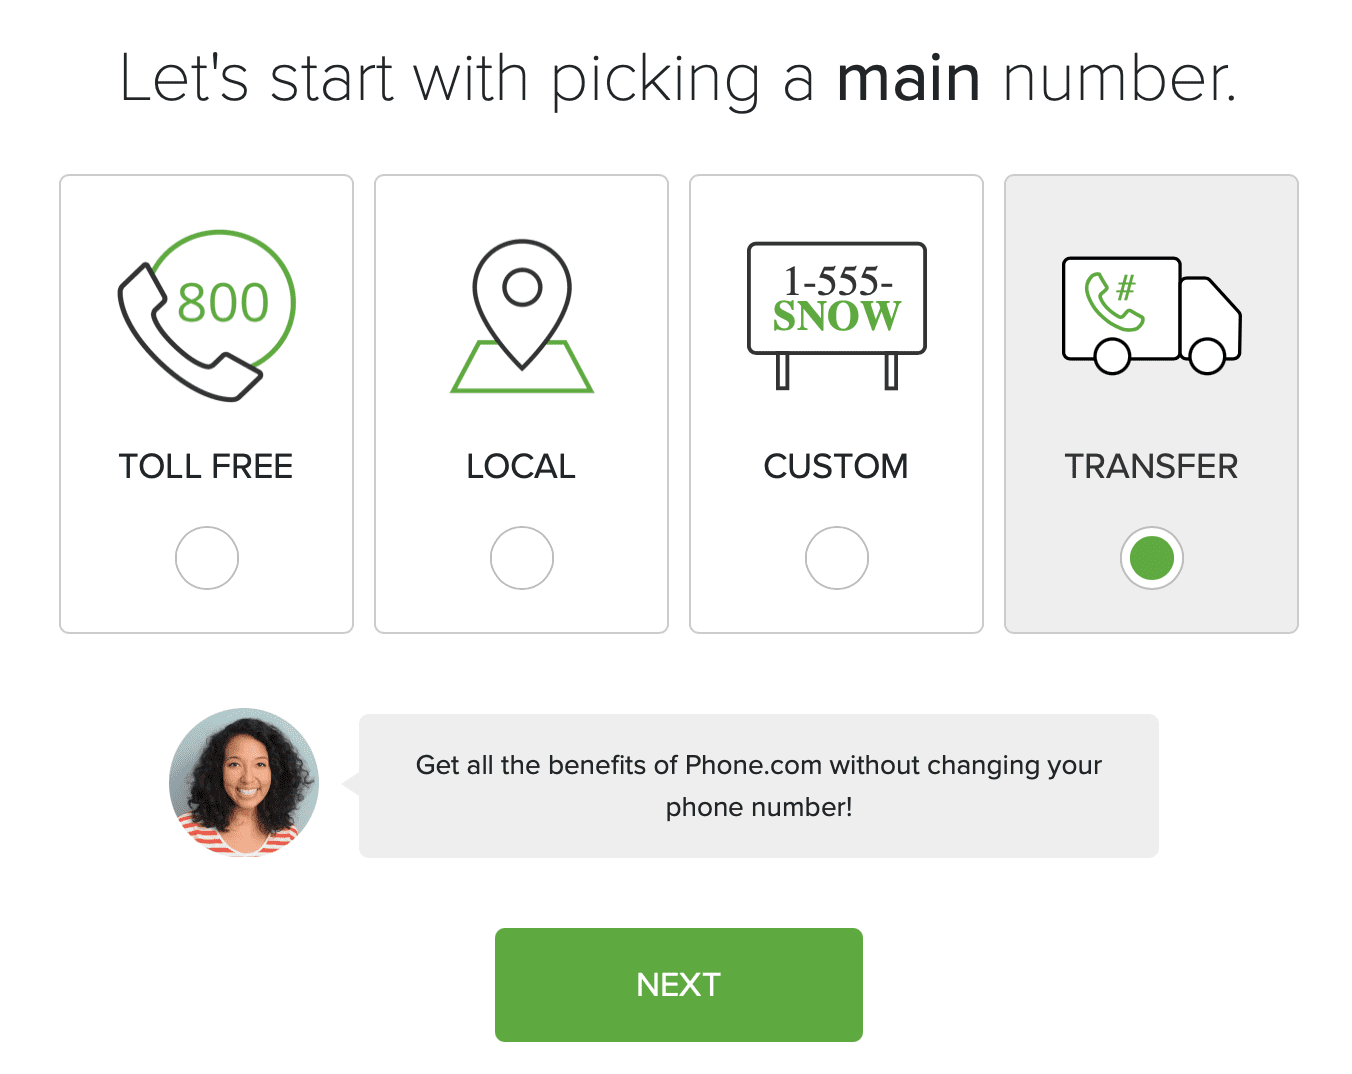
- On the next step you will be auto assigned a temporary number which you can configure and use while your transfer is in progress.
- Finish sign up flow and you will get 2 reminders from us:
-
- Email with a video guide on how to submit a transfer request and links to the control panel with a Transfer Request form
- We will display one-time notification badge to guide you to the instruction tab on Configure, as shown below. It will disappear after you clicked on that tab for the first time.

Submitting your transfer request
To submit a transfer request, Configure offers a step-by-step guide that will capture all the information needed to submit the information.
* Important to note that if you exit the transfer wizard at any time, you will lose any saved information. Clicking anywhere outside the wizard will show the following dialog box to prevent you from exiting accidentally:
![]()
- Log into configure.phone.com using your administrator credentials.
- Click on Numbers.
- Select Transfer number on the top navigation options
You will immediately reach step 1 of the transfer wizard.
Step 1: Checklist
As explained previously, transferring a number is a process that can result in rejections by your current provider if the account is not in the correct status and/or the information provided is incorrect.
Step 1 gives you an overview of what to take into account.
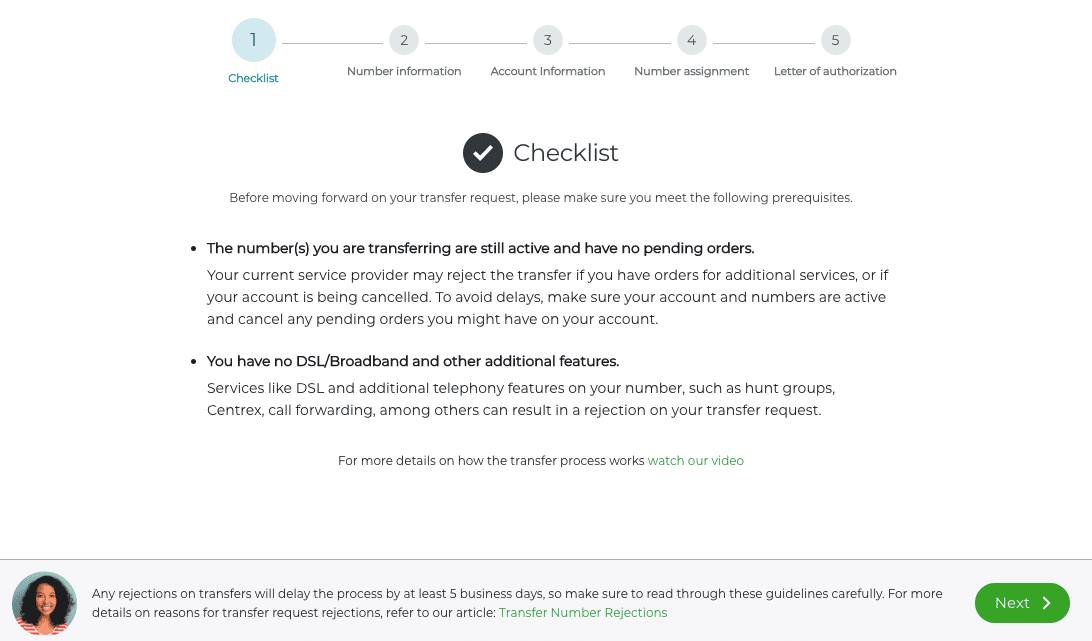
Once you’ve read through the checklist and gone through the video, click Next.
Step 2: Number information
Here we will collect all the information pertaining to the number you will be transferring over to Phone.com.
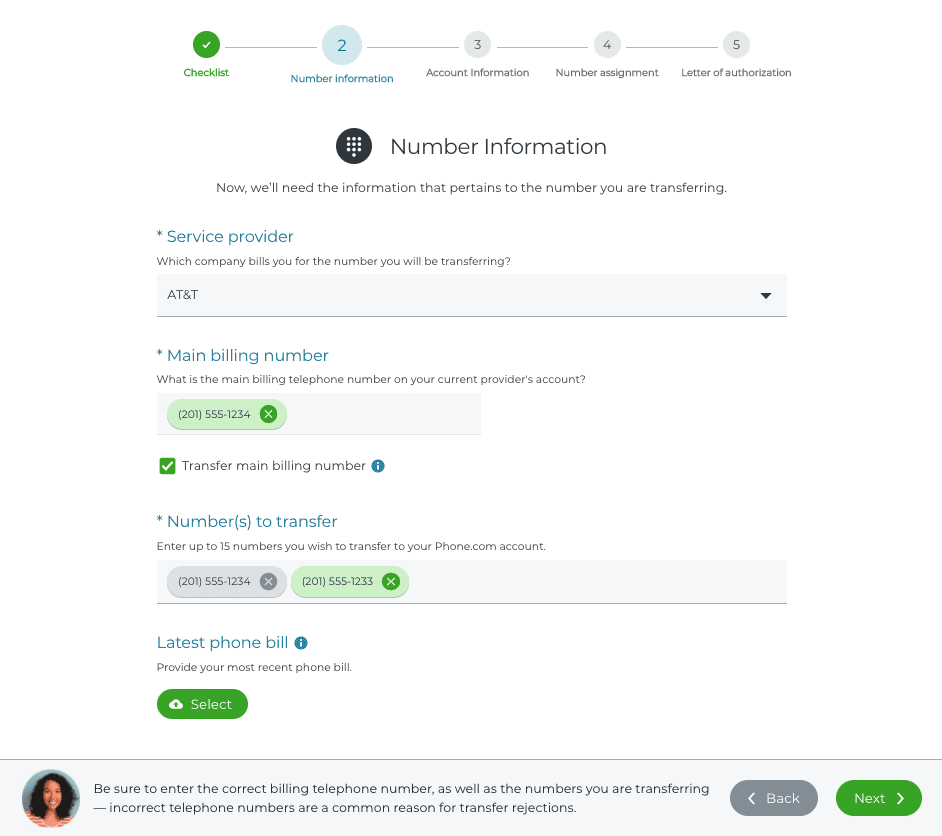
- Service Provider: Select the service provider that bills you for the number(s) you will be transferring.
- Main billing number: This is the main billing number on the account that owns the number(s) you are transferring. Once the number you enter is valid, it will turn in a chip as shown on the image above. * If you are also transferring the Main billing number, you can check the Transfer main billing number option.
- Number(s) to transfer: Here you can enter all the numbers you will be transferring to Phone.com. * You can enter up to 15 numbers per order.
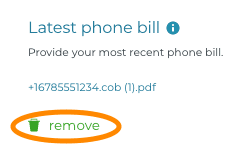
- Latest phone bill: Select the latest phone bill for the numbers you are transferring. Not uploading the latest bill will result in delays to your transfer request. * You can change the file you selected, by clicking on remove as shown below.
Step 3: Account information
Here we will collect all the information pertaining to the account for your number.
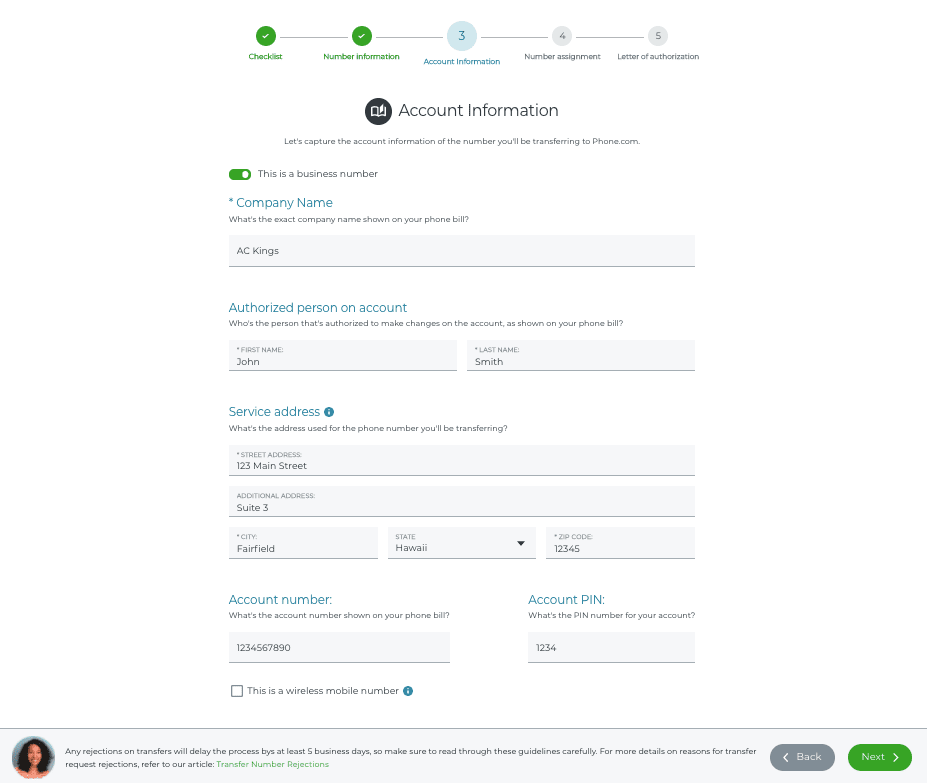
- This is a business number: If the number(s) you are transferring are on a business account, make sure to enable this option, so you can enter the Company name.
- Company name: Here you must enter the exact legal name of the company shown on your phone bill. * This option will appear when you enable this is a business number.
- Authorized person on account: Enter the legal name of the person registered to manage the account where the number(s) you are transferring are being held.
- Service address Enter the full service address on your account. It’s important that you enter this information correctly to avoid delays in processing your transfer request. * Incorrect service address is a common reason for rejections, so make sure to enter the information exactly as shown on your phone bill.
- Account number: Enter the account number as shown on your phone bill.
- Account PIN: Enter the PIN number you use for security purposes on your account. If you’re unsure of your PIN number, contact your current service provider.
- This is a wireless mobile number: Check this box if you’re transferring a wireless mobile number.
Once you’ve entered the correct information, click Next.
Step 4: Number Assignment
Here you can assign a temporary number to the number you are transferring.
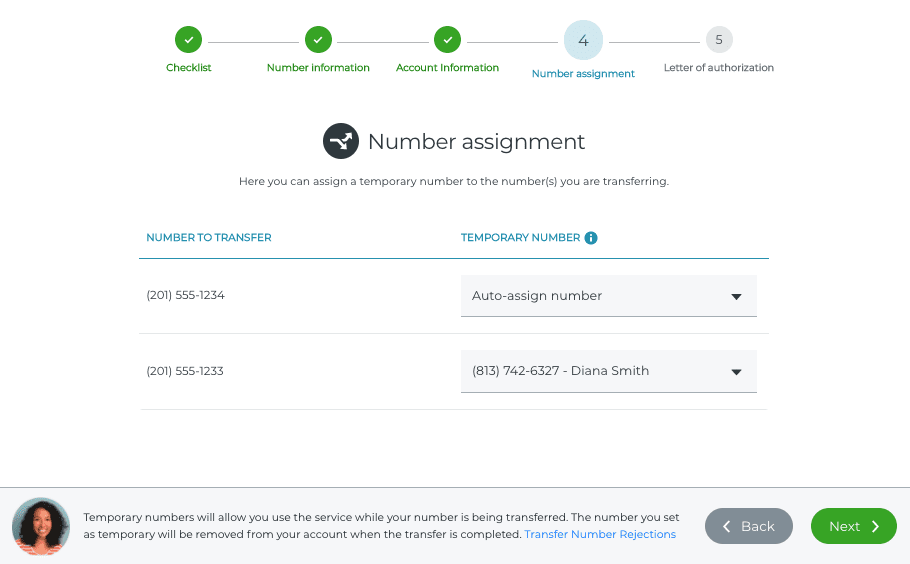
- Temporary number: Each number you are transferring must be assigned a temporary number.
You can select between Auto-assign number and a number that’s already on the account.
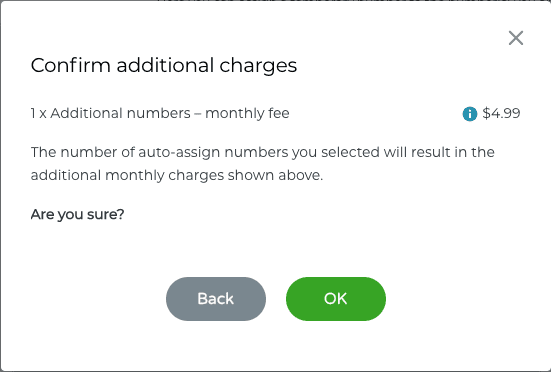
Auto-assign number, will auto-generate a number when you submit the request. Additional charges may apply depending on how many numbers you currently have on your account. If the process results in additional charges, then you’ll see the following dialog box asking for confirmation on the charges.
Once you’ve done all your assignments properly, click on Next
Step 5: Letter of authorization
The last step is a confirmation and digital acceptance of the Letter of authorization, which will allow Phone.com to process the transfer request for Local US number.
* Toll-free numbers require an additional paper signed letter of authorization, which is sent by email after submitting the transfer request.
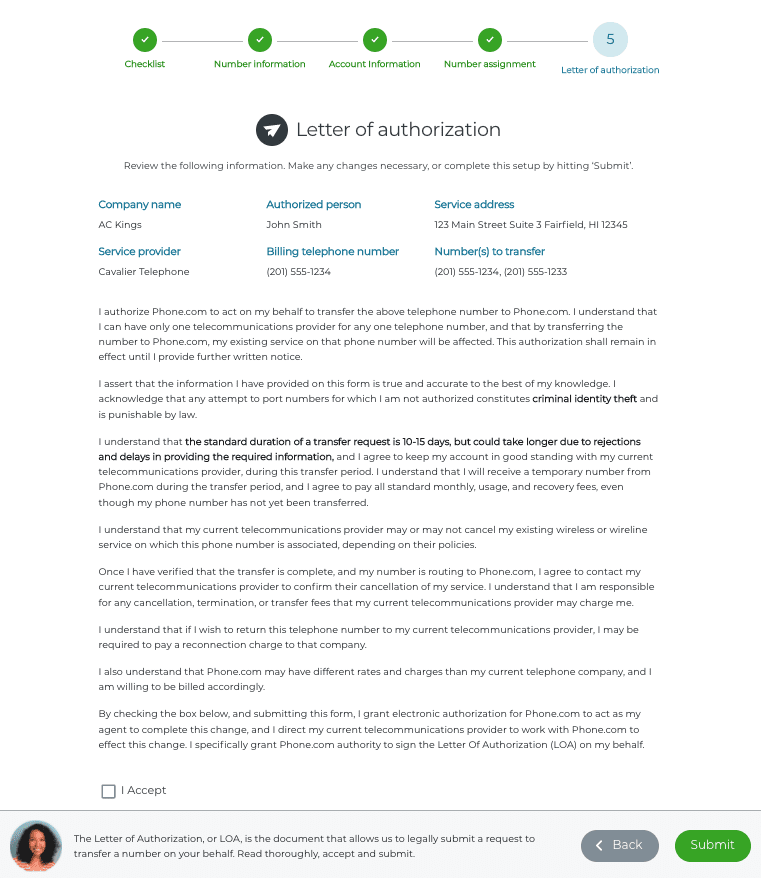
Read through, click “I Accept” and click on Submit once done.
At this point, you’ll be redirected to Transfer requests, where you can see the status of your transfer numbers, along with the ability to upload necessary information.
For toll-free numbers only, you will also need to sign and submit a physical copy of your Letter of Authorization, which is the form you completed online for your number transfer. The form to print, sign and submit is attached to the email.
Follow the instructions on your email.
You’re Done!
Once your proof of ownership document and signed Letter of Authorization are submitted, you’ve done your part! We will review and process your transfer, and you’ll be notified when your toll-free number has been transferred or if we encounter problems transferring it.
In general, it takes 10-15 days to transfer a number, with some numbers taking up to 30 days to transfer.
Tip! In the meantime, use your temporary number, listed on the Manage Numbers page (Configure > Manage Numbers), to configure and test your settings. Forward the number that you’re transferring to your temporary number to begin routing your calls through Phone.com immediately!
If you have any questions about transferring your number, please contact our Customer Service team for more information.
Important information around your transfer request
- Don’t cancel service with your current provider until your number transfer is complete.
- Your phone number must be active to transfer it.
- Make sure to use the exact same name and address information that your current provider has on file, or they may reject the transfer request.
- Your current provider may reject the request if you have remaining contract obligations or a pending order related to the number.
- Transferring a number usually takes between 10-15 days, but it can take longer. In the meanwhile, we have issued you a temporary number. Many customers use their current service to forward their existing number to the temporary one while waiting for the transfer to be complete.
3. Transfer request status
After you submit your transfer request, you will be able to determine the status and provide any necessary documentation to process your transfer requests.
Navigating to the Transfer requests section:
- Log into configure.phone.com using your administrator credentials.
- Click on Numbers.
- Select Transfer requests on the top navigation options
* Note: Accounts that do not have an active transfer request will not be able to see this tab.
Below you can see the interface:

- Transfer number: Displays the number you are transferring to phone.com
- Temporary number: Displays the temporary number assigned to the number you are transferring.
- Date received: This is the date in which phone.com received the request to transfer the number.
- Status: Displays the status of the number you are transferring. Below you’ll see a description of each status.
- Copy of bill” This section allows you to upload a copy of the bill needed to verify the transfer request.
- LOA (Letter of authorization): Only visible for toll free number and allows you to upload the signed letter of authorization required to process transfers for toll free numbers.
Description of Transfer Request Status
- ‘Under review‘ – The transfer request has been received and is being reviewed by a porting specialist. The review covers checking that all the information provided matches the documentation you provided. This will help us avoid rejections during the process.
- ‘Requires additional information‘ – The transfer request has been reviewed and it has been determined that there is either missing or incorrect information. A request in this status will require you to provide additional information or documentation, such as a copy of your bill, confirmation of your service address, numbers being transferred, among other. Phone.com will send emails to inform you what is needed to continue with the transfer request. In order to avoid further delays, make sure to respond as soon as you can so we can continue with the transfer request.’
- ‘Waiting on provider‘ – The transfer request has been reviewed and approved by a porting specialist. It has also been submitted to your current provider to request the transfer of your number. At this point, we are waiting for your service provider to approve or reject the request.
Uploading files to your transfer request
As described earlier in the guide, documentation must be submitted with each transfer number and this information depends on the type of number you are transferring. For Local US numbers, you must upload a copy of your most recent bill and for Toll Free Numbers, you must also upload a signed letter of authorization.
Here are the steps to upload a file
- Locate the file you need to upload. Make sure to confirm that this is the correct file or else the transfer request could be delayed.
- Navigate back to the interface.
- Locate the transfer number for the file you will upload.
- Click on Upload for the correct type of file.
- Select the file you will upload.
- Review the information on the dialog box.
- Click Confirm.
- If this is the last file needed for the transfer number, the status will change to Under Review.
- We will get in touch with you if more information is needed.
* Note: Once a file is uploaded it cannot be deleted, so make sure you upload the correct file.
4. Additional info
Temporary numbers
When your transfer request has been submitted, we are providing you the temporary phone number, which you can use while your transfer is processing.
You will find your temporary number under My Numbers, temporary numbers section.
You can configure your temporary number to match how you want your transfer number to answer calls.
We will send you an email when the transfer is completed, at that time, your transferred number will process calls just as you had configured your temp one
Provide proof of ownership
You’ll need to submit proof to Phone.com and your current provider that the number you are transferring is indeed yours to transfer.
Please submit one of the following forms of proof by email or fax to Phone.com:
- A copy of your phone bill, dated within the last 30 business days
- A screenshot of your online account, showing your name, address and the phone number that you are transferring
- A copy of the original invoice from the purchase of your phone number
- A letter from your current provider, stating that the phone number belongs to you
You can submit this documentation in 3 different ways:
- During the transfer wizard, you can upload the documentation during Step 2.
- You can also upload a scan or screenshot of any of the above documents. To do this, complete the following steps:
- Navigate to over Configure.
- Click on Numbers, then select Transfer requests.
- Locate the number you need to upload the documentation for.
- Under Copy of bill, upload the file for the correct numbers..
- You can Ssubmit attachmentsthem by email to [email protected], and send faxes to (858) 777-9888 to the attention of our Porting Department.
Submitting your letter of authorization
Transferring a toll-free number requires that you also submit a signed Letter of Authorization to your current provider. This is not required when you transfer a U.S. local phone number.
To complete this step, simply open, print and sign the Letter of Authorization attached to the confirmation email you received after submitting your online transfer request.
Submit your signed letter by email to [email protected] or fax to (858) 777-9888, to the attention of our Porting Department.
You can also upload a scan or screenshot (PDF format only) of any of the documents listed above. To do this, complete the following steps:
- Mouse over Configure and click Manage Numbers.
- The number that you are transferring will be listed under Numbers on Order. For Please Upload Your Signed Letter of Authorization, click Choose File and navigate to upload the PDF file that you want to submit.
Transfer denials
While number porting is a common activity that is generally completed within 15 business days (although some requests can take up to 60 business days), some requests are denied.
The most common reasons for denial are:
- Number not active: The phone number must be active with the customer’s previous service provider for the port to be successful.
- Name/Address mismatch: The name and address must match what’s in the records of the previous service provider.
- No PIN/account number: For wireless numbers, the account number and PIN associated with the account are required for porting approval.
- Rate Center Not Supported: In some rare cases, a phone number may not be available within a certain geographical area.
- No account number/password: For some providers, the account number and password are required for porting to be completed.
Here are some common reasons for rejection by provider and how to resolve them.
8×8 – 8×8 locks their numbers with a PIN. In order to move forward, contact 8×8 and request the CSR and PIN associated with the number porting.
Comcast – Comcast requires the end user to provide their account number. This can be located on your Comcast invoice.
Dialpad – A PIN must be generated to port out your number. Please follow the instructions provided by Dialpad.
eFax – Please review your contract with eFax. Their terms state that a customer is allowed to port out only if they are ported in. You may also be subject to a fee. If an attempt is made to port out a number that isn’t allowed to be ported, customer is subject to a large fee. If PIN/LOA is required, we will work to resolve this, but please expect delays.
GoDaddy – GoDaddy requires unlocking your number to port out. Follow the instructions provided by GoDaddy.
Google Voice – Google Voice requires their end user’s to unlock their number prior to porting out. You can unlock your number at the following link: https://www.google.com/voice/b/0/unlock?pli=1. If there are no numbers to unlock, make sure customer is only logged in to the specific Google account and not multiple accounts.
Google Voice via G-Suite – In order to obtain PIN, follow instructions provided by Google.
Grasshopper – In most cases, Grasshopper utilizes a 3rd party carrier which requires their reseller information for a successful port. Contact Grasshopper to obtain a Customer Service Record (CSR).
iPlum – In order to port out from iPlum, you will need to unlock information. Please follow the instructions provided by iPlum.
Magic Jack – In order to port your Magic Jack number, you’ll need to provide an account number and the account password. The account number is located on the home page of your account and the account password is the password used to log in to your account.
Metrofax – Please review your contract with MetroFax. Their terms state that a customer is allowed to port out only if they are ported in. You may also be subject to a fee. If an attempt is made to port out a number that isn’t allowed to be ported, customer is subject to a large fee. If PIN/LOA is required, we will work to resolve this, but please expect delays.
MyFax – Please review your contract with MyFax. Their terms state that a customer is allowed to port out only if they are ported in. You may also be subject to a fee. If an attempt is made to port out a number that isn’t allowed to be ported, customer is subject to a large fee. If PIN/LOA is required, we will work to resolve this, but please expect delays.
Nextiva -Nextiva may have different information in the backend required to port out your number. Please request a CSR directly from Nextiva to ensure the correct information is submitted. You can request a CSR by following the instructions here.
NumberBarn – When you activate your number with NumberBarn, they will provide you with the account number and PIN. Screenshot this information and upload to your port request, as this can serve as proof of ownership.
Onebox – Please review your contract with OneBox. Their terms state that a customer is allowed to port out only if they are ported in. You may also be subject to a fee. If an attempt is made to port out a number that isn’t allowed to be ported, customer is subject to a large fee. If PIN/LOA is required, we will work to resolve this, but please expect delays.
Sideline – Sideline requires their end user to go through a process to unlock the account number and PIN associated with their number. Follow instructions provided by Sideline.
Tracfone – The account number is either your device’s MEID/IMEI serial number and the PIN can be 0000. For more information, please follow instructions here.
Verizon Business – Please reach out to your provider and request a Customer Service Record. If this is unattainable, we will attempt to request a CSR on your behalf, but there may be a delay.
Wireless Providers (AT&T, MetroPCS, Verizon, Sprint, T-Mobile, etc) – All wireless providers require account number and PIN to validate a port out. The account number is usually located on your recent invoice. Your account PIN is typically the 4-digit number that you set when signing up with your other provider.
Time Warner Cable – Time Warner Cable requires the end user to provide their account number. This can be located on your Time Warner Cable invoice.
If you need further assistance, please contact Support.