Learn about User Settings:
FAQ
My Profile
Incoming Calls
Voicemail
Notifications
e11 Address
1. FAQ
What are the User Settings?
Phone.com NxT users have their own personal settings, so they can configure things for what works for them, by themselves. This includes things like their name, their voicemail message, their notification preferences, and their incoming call preferences. For example they can setup a forward number so that when they get a call, their cell phone rings.
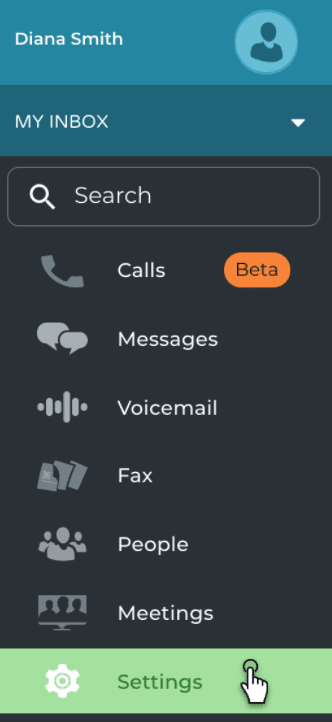
How can I access the User Settings?
Login to My.Phone.com and click on the Settings button in the left nav bar.
2. My Profile
Change your personal information
The profile user settings allows to change the core user profile information, like name, email, timezone, and voicemail PIN.
Simply edit any field, and save. Looking to change your extension number? Contact your Phone.com administrator, they can do it for you.
Pro tip! If you are looking to change your password, go to our login page and click on forgot password.
Pro tip! The voicemail PIN is used to access your voicemail using any phone, learn how here.
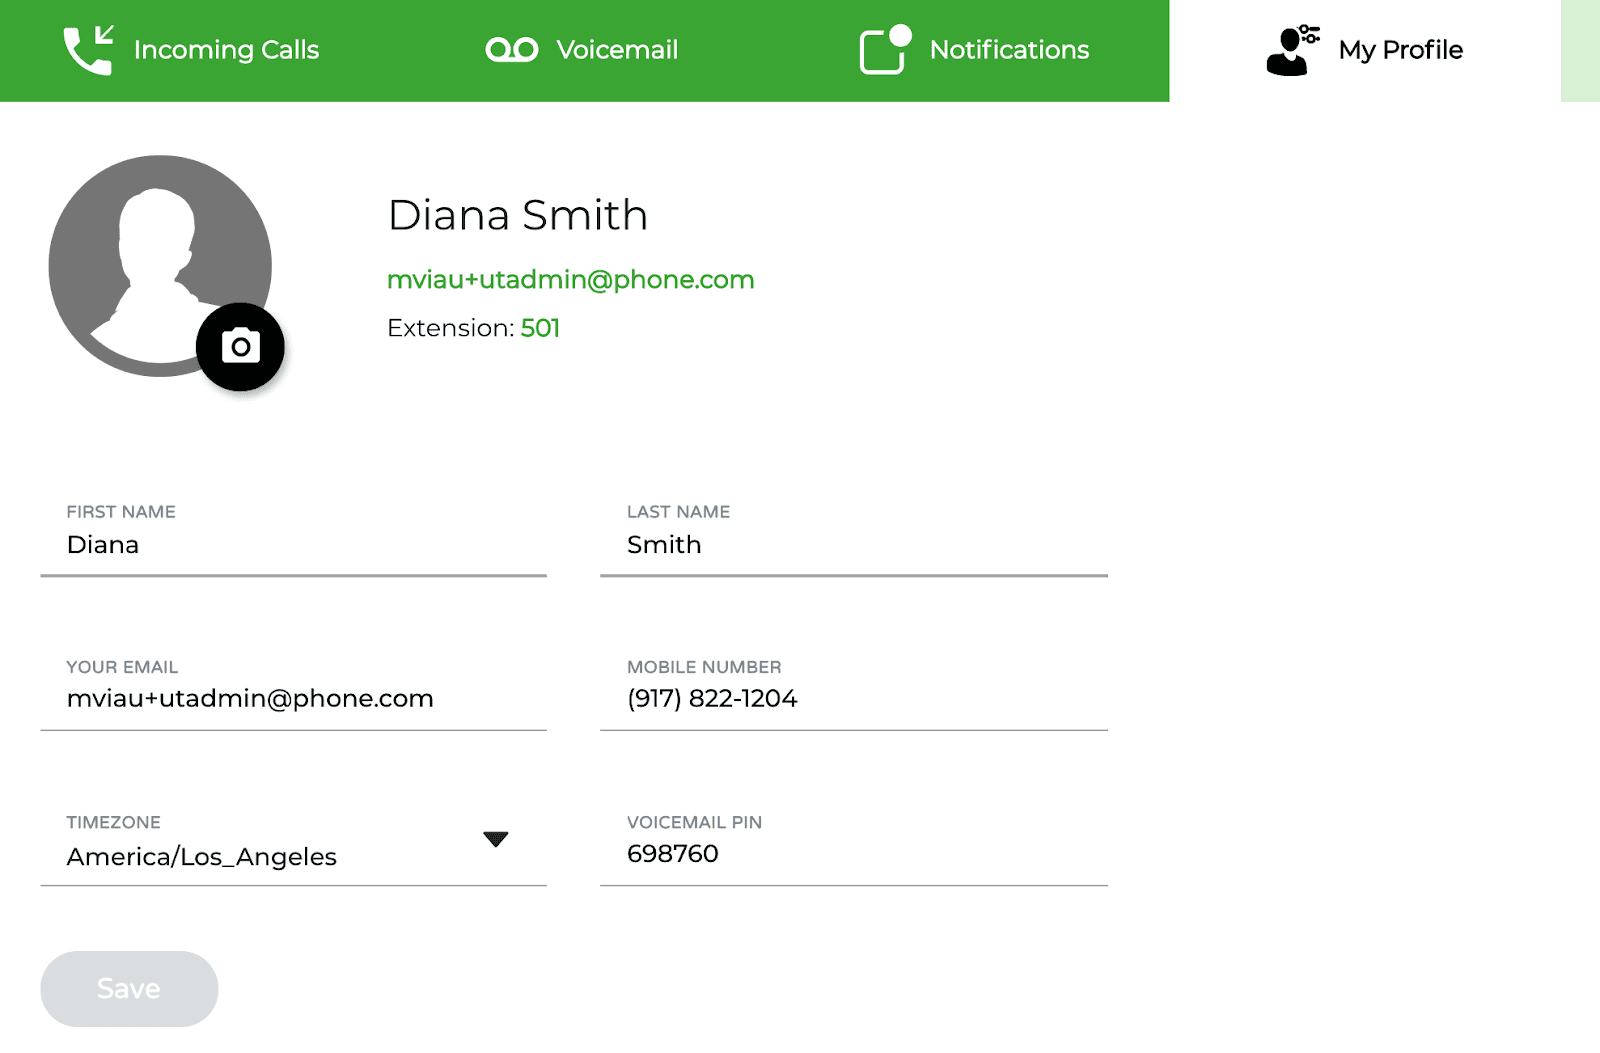
Add a profile picture
It really helps to have people see your profile picture when they interact with you within Phone.com. So make sure to click on the camera icon and select a good picture of you, and crop it so it’s nice and centered. To crop it, just drag the circle in the preview image, to the size, and location that works. Then click Save!

Change your voicemail PIN
You only need your voicemail PIN if you need to check your voicemails using another phone. Otherwise it’s minimally needed, so you don’t need to worry about it much. But if you need to change it, this is where it’s at!
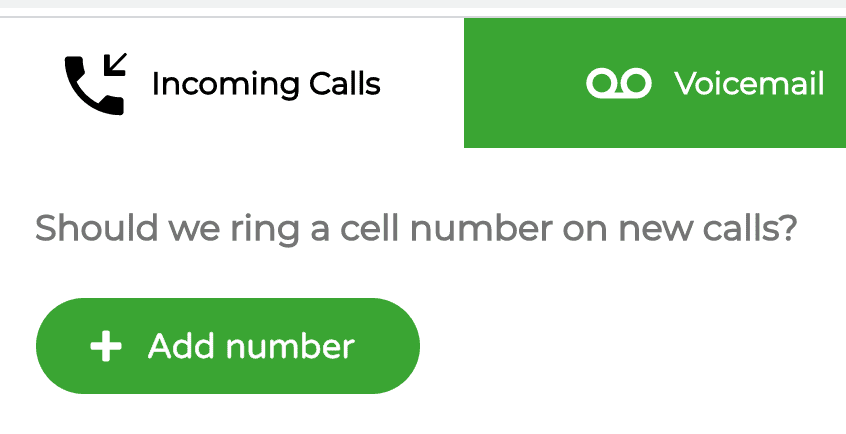
3. Incoming Calls
Call forwarding
The incoming calls section is where you configure what happens when you get a phone call.
By default, when you get called, if you have My.Phone.com or the mobile app installed, both of them will ring and show you your incoming call.
However, you may prefer to have calls forwarded to your cellular number. Sometimes cellular network are more reliable, so it can be helpful to setup call forwarding to your cell phone, or even to a landline number.
As such, you can use this section to setup the number you’d like calls to you to forward to.
Just a note, you do not “have to” do this, just install our app and sign in, and you’ll get calls on your cell readily.
Note: an admin user can also set this up on your behalf using our configuration app. So don’t be surprised if you see your personal cell phone already there! It’s them who set it up in advance for you. If you are an admin user, and looking on how to do that for other users, see the manage my users documentation.
Enabling call forwarding
To set it, first click on + Add number:
Then enter the number you want to forward to:
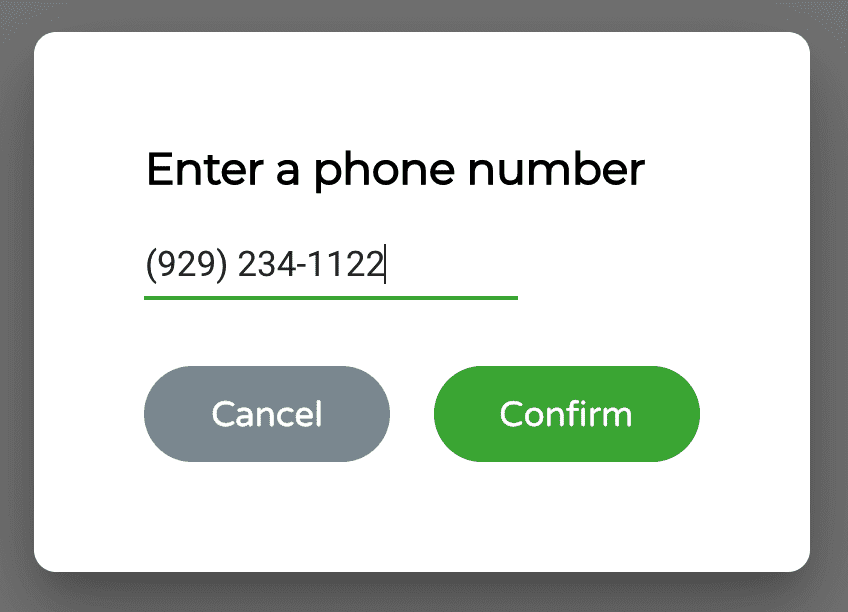
And voila, calls to you will now ring to your cell phone as a regular cellular call!

4. Voicemail
Setting your personal voicemail message
The voicemail section allows you to change your personal voicemail message.
Until you set one, anyone getting your voicemail will hear the standard Phone.com voicemail message.
It’s always a good idea to set a personal voicemail so your callers know that they reached you. Try and give them an idea of when you’ll get back to them.
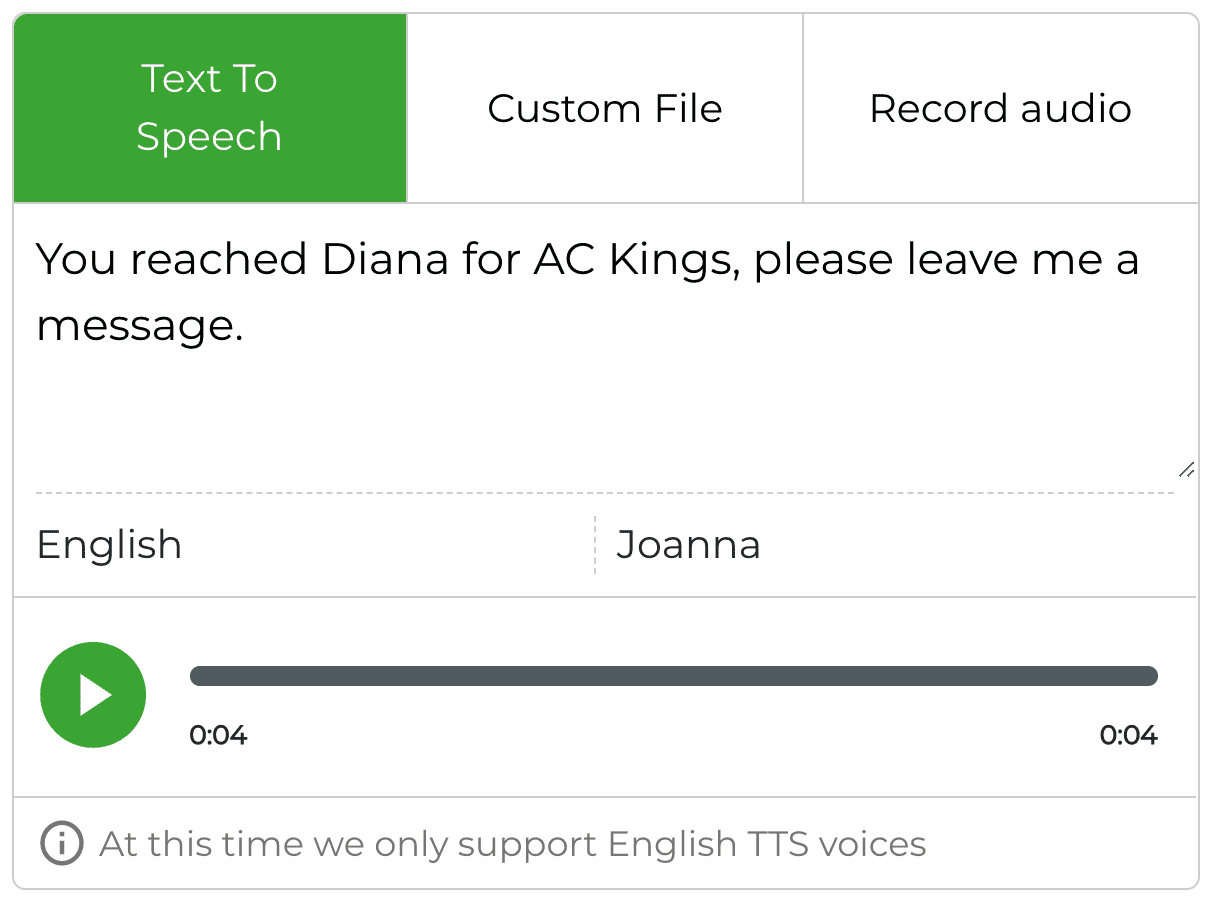
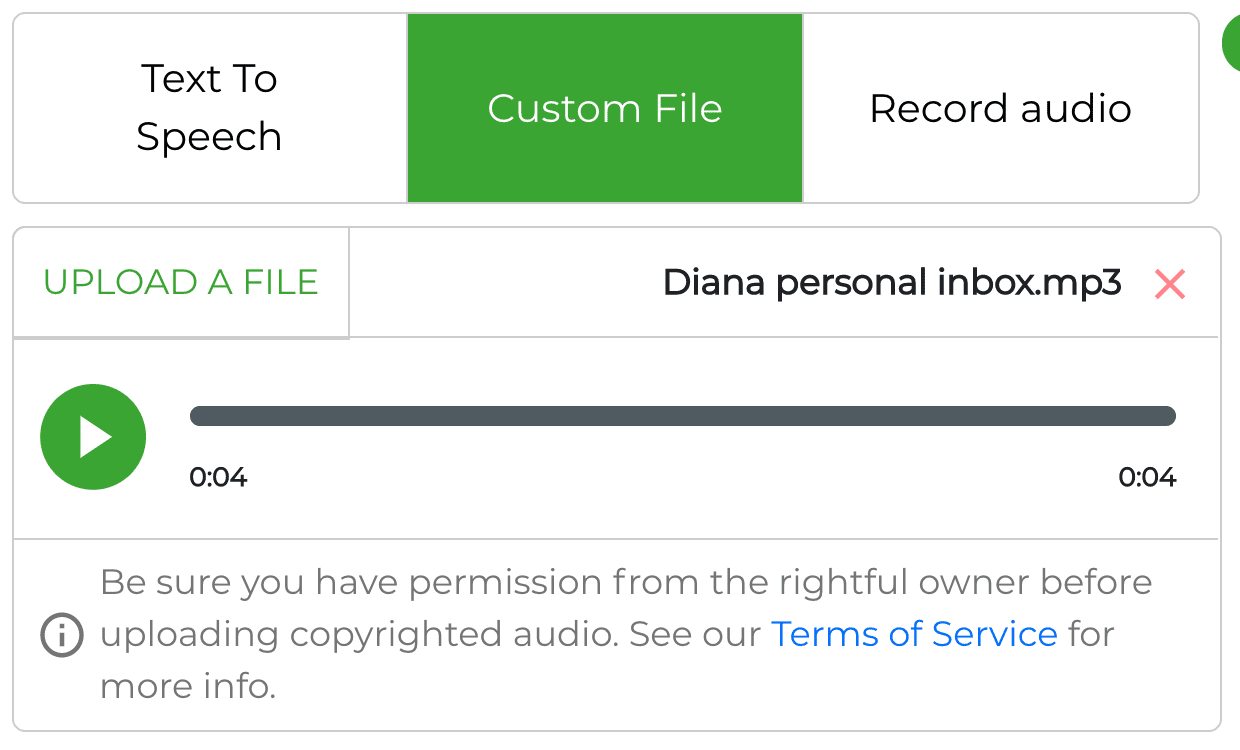
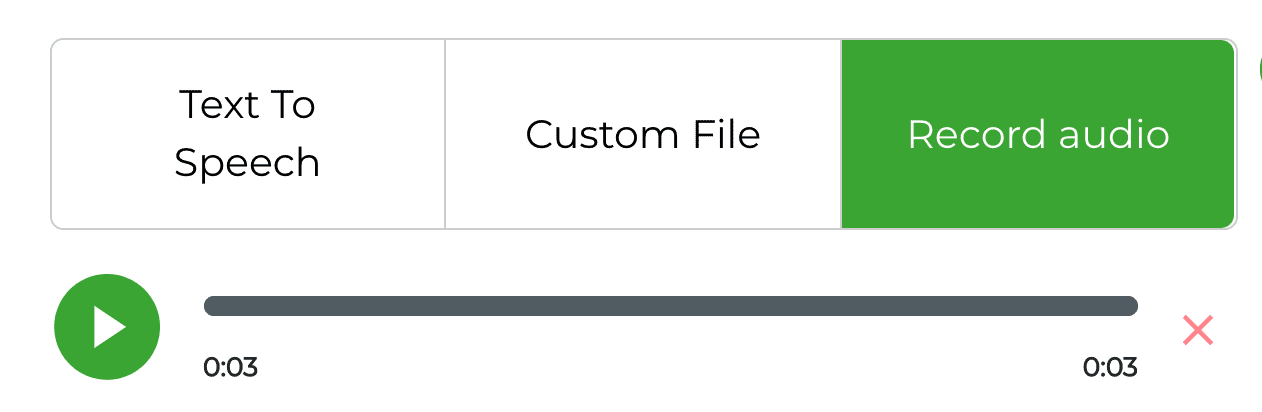
You have 3 options to provide a voicemail message:
text to speech: enter some text there, save, then listen to it. Note: you will need to click Save before you can listen to your message.
upload a file: if you have au audio file (.mp3), that you prerecorded, you can upload it using that function
record audio: you can record an audio message using your computer, simply speak close to the mic
Make sure to click Save after you like it!
Note: to change your voicemail PIN, use the Profile tab, it’s there.
5. Notifications
The notifications tab allows you to configure the notifications you get in your browser, as well as your email.
Desktop notifications
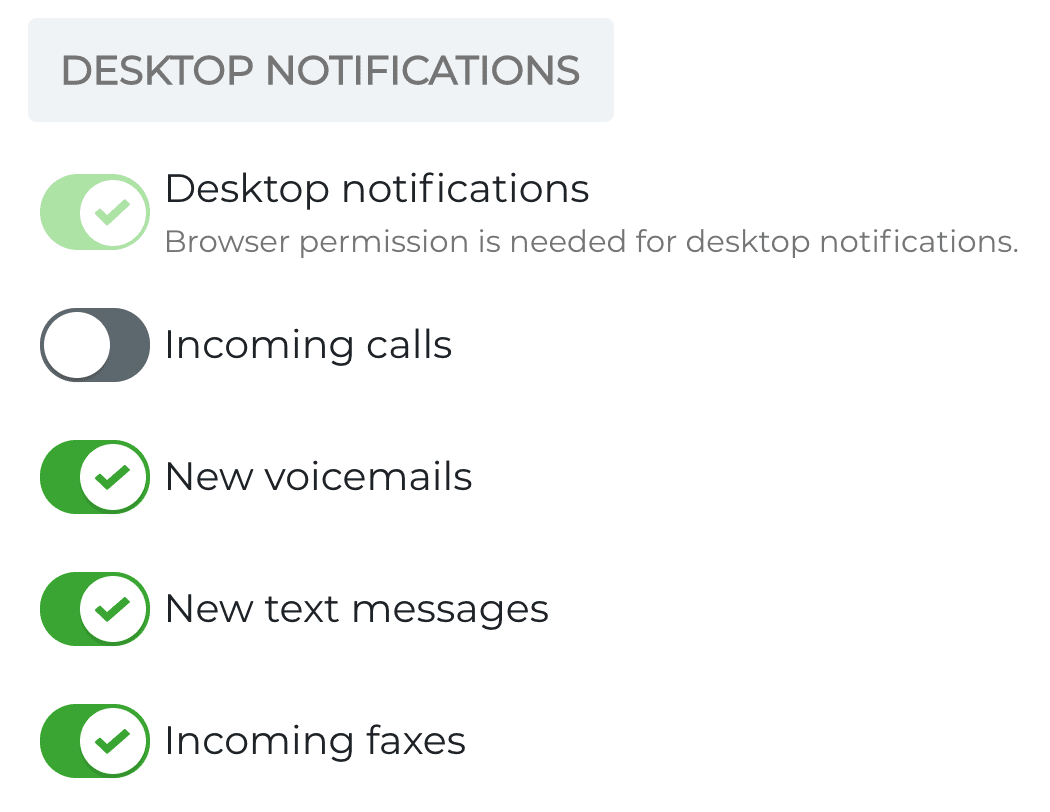
The top section called “desktop notifications” are about the notifications you will receive on your computer. Desktop notifications show up at the top right on Mac, and bottom right on Windows.
You need these enabled to get incoming call notices, and get notifications when you get new text messages.
Enabling desktop notifications
Before you can receive any notifications, you must allow notifications. There should have been an orange banner when you first arrived on My.Phone.com, hopefully, you clicked “enable notifications” and accepted the permission.
If you did not, it’s ok, you can still enable notifications by following these steps (Chrome only):
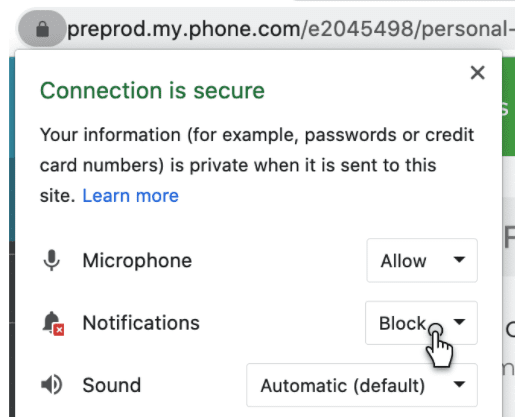
click into the URL of my.phone.com at the top of your browser, it will highlight the url in blue:


click on the lock next to the url
next to Notifications section, click on Block:
click on Allow:
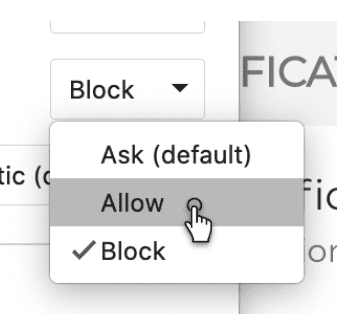
then click on the blue button Reload
Your browser notifications are now enabled!
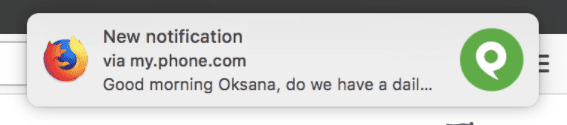
By the way, that is what a desktop notification looks like in Mac:
Changing desktop notifications
If you do not wish to receive incoming calls, or be notified for each new text message, then simply toggle off the related option within the desktop notifications.
For example as below, a user would not receive incoming calls:
Email notifications
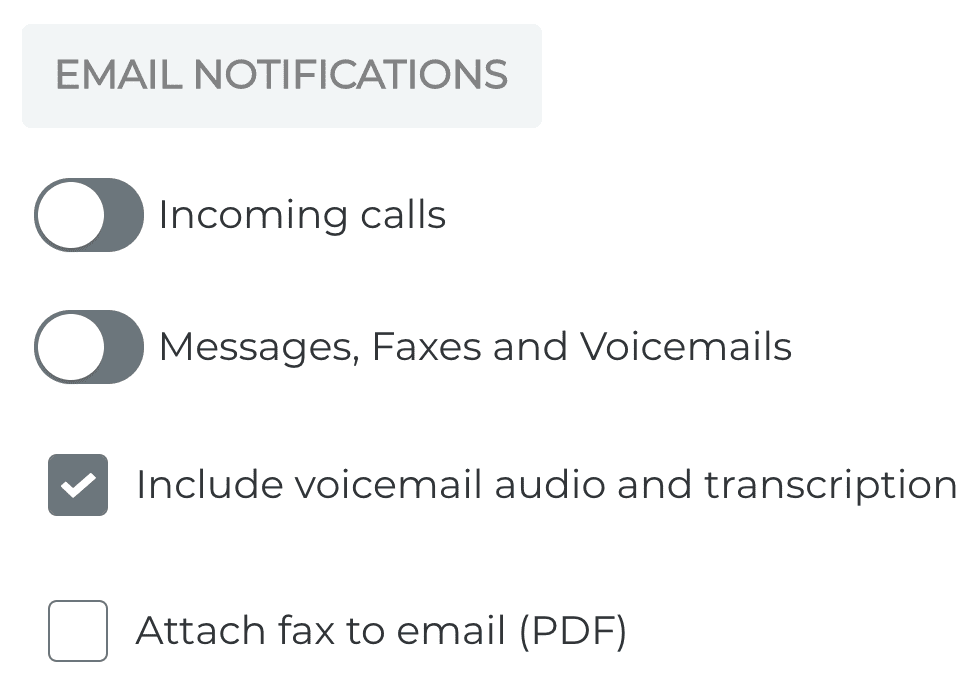
If you wish to receive notifications about events in Phone.com into your email, perhaps because you manage your work from your email inbox, you can toggle these options on.
You can send messages to email, fax to email, voicemails to email, and notifications of incoming calls.
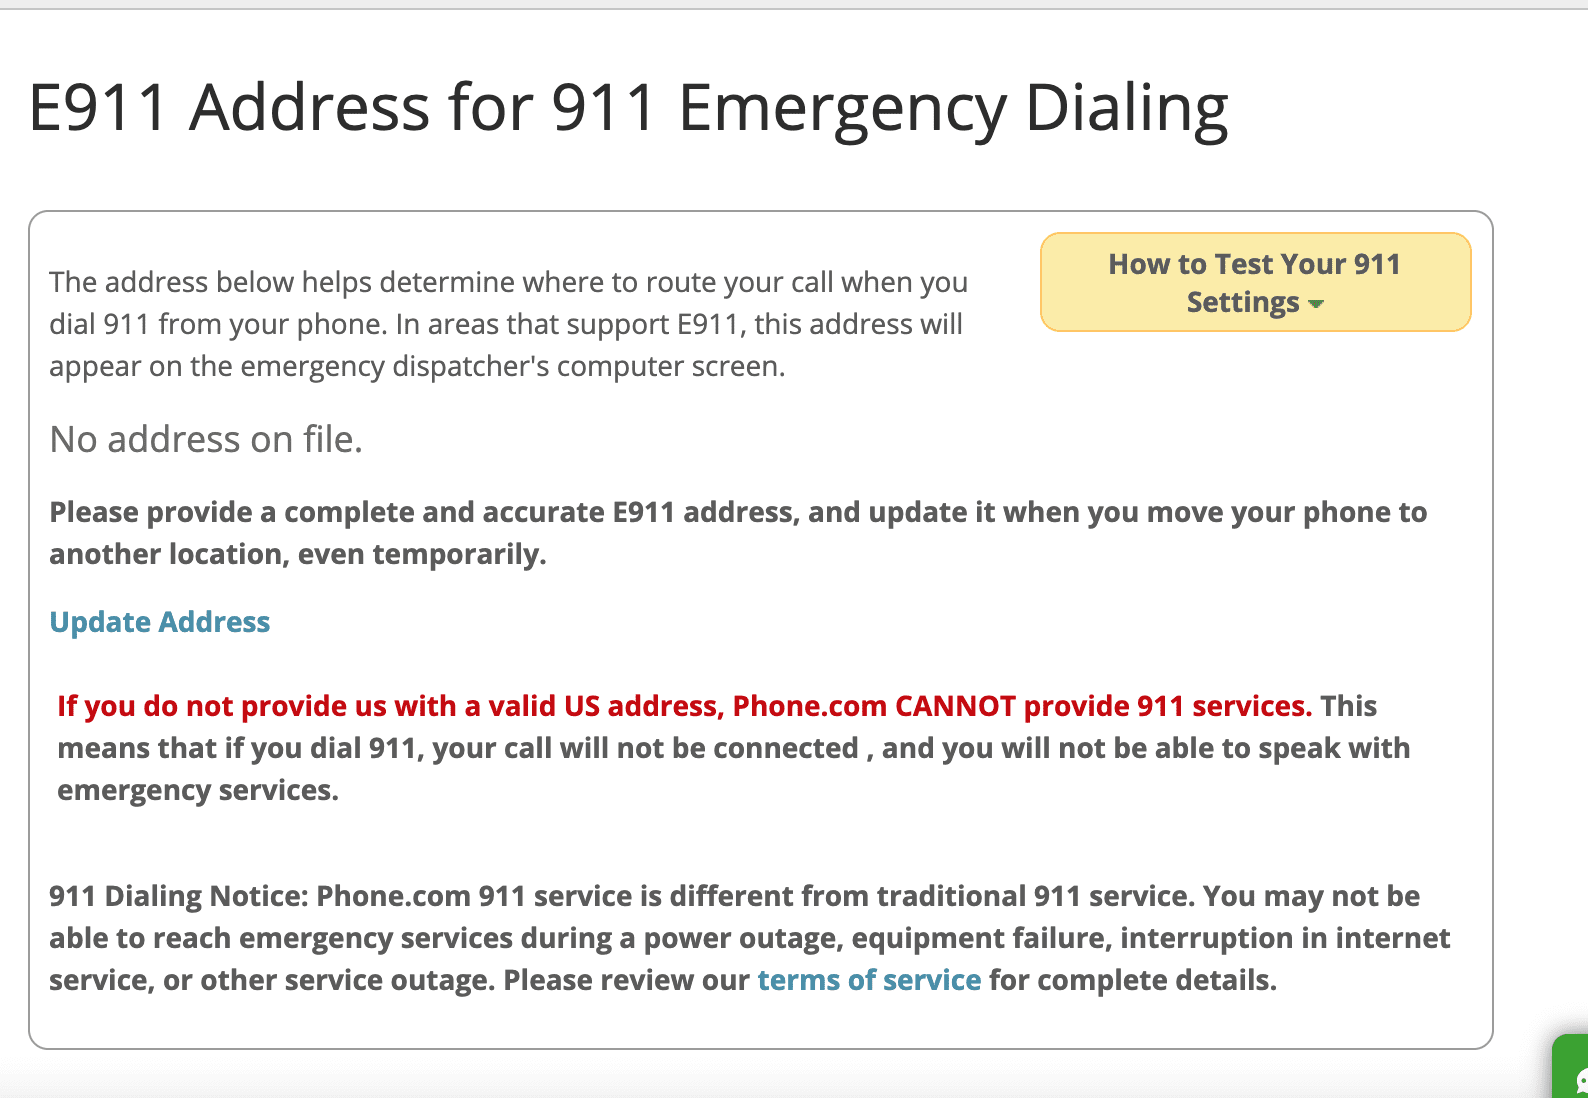
6. e911 Address
E911 calls can be made only through physical desk phones. E911 service is not available on our mobile app (use your local cell service) or on our softphones (Desktop App and My.Phone.com).
You must ensure to update your E911 address to your current location for E911 service to send responders to the right address. To update your E911 address, login to the control panel using your extension login information (see how to login here).
After you log in, go to your E911 settings here:
https://control.phone.com/voip/extension?action:default=e911_settings
Before you set your address on file:
After you set your address on file:
